The dropper seatpost has rapidly become a must-have item for pretty much every kind of mountain biker, but there are a huge array of different styles, models, fitment options, travels and more than can make getting the best one for you tricky. Our complete guide to dropper posts will make it all much easier.
- The best dropper post you can buy for your mountain or gravel bike
- Your complete guide to Shimano mountain bike drivetrains
- Best mountain bikes you can buy for under £2,000
A dropper seat post allows you to adjust your saddle height while riding, using a spring and some sort of system to hold it at a certain height. They've become increasingly popular with all kinds of mountain bikers in recent years and there are a huge number on the market today.
This article will answer some key questions about who would benefit from using a dropper post, plus the main benefits and drawbacks, as well as how to pick the right one for your needs and bike.
Why should I use a dropper post?
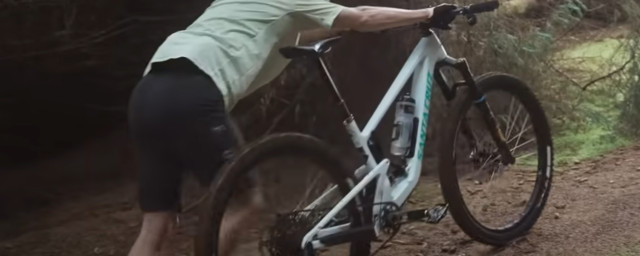
Saddle height is hugely important for off-road riding. You need to be able to have it high enough to give effective and efficient pedalling but when you hit technical terrain or steep descents, it needs to be low enough to allow you to easily move your bodyweight around to stay in control.
In the days before dropper posts, you could either set your saddle at a fixed height that wasn't best for either climbing or descending with a resulting loss of control and efficiency in both or you'd have to stop and manually drop your seatpost, which was time-consuming and annoying.
A dropper post allows you to have both positions - and often anything in-between - on demand, meaning you can move from technical descending to climbing without pause or loss of efficiency.
- Brand X Ascend 150mm dropper post review
- PRO Koryak 170 dropper post review
- Ritchey WCS Kite dropper post review
Which kinds of riders benefit most from having a dropper post?
The answer is pretty much every mountain biker that's not fixated on weight above everything else. Certainly, if you're an enduro racer, having one is pretty much an essential to putting in a good performance in the mixed up'n'down stages they race and pretty much all trail riders will find one useful too, whether they ride trail centres or off-piste wild trails, even if it's just to keep the flow going.
The jury is still out when it comes to pure cross-country riding, however. If you don't tend to hit very technical trails then you can probably get away without using one - after all, everyone did without back in the day - but even more cross-country racers are realising they're extremely useful, usually quicker and worth the weight penalty.
Basically, if you want to ride safer, faster and with less mid-ride faffing, get yourself a dropper post. If you're obsessed about weight or on a very tight budget, going without will do just fine.
What's the best dropper post for my bike?
Not so easy to answer this one, as there are a whole load of variables going on, not just the massive one of cost. We'll cover what you need to consider below...
How do I know what size of dropper post I need?
Much like fitting any seatpost, you'll need to know the internal diameter of your bike's seat tube. This will often be written on your current post in millimetres or you can refer to the frame manufacturer's specifications. If you can't find either, just measure it yourself with a set of Vernier callipers. Most seatpost sizes are now pretty much standardized, with 27.2mm, 30.9mm and 31.6mm being the most common.
If you have a bike with the two larger sizes, you'll have pretty much the choice of everything on the market, but anyone with a 27.2mm post might find their choices limited as the narrower size makes it hard to fit the necessary internals inside.
- X-Fusion Manic dropper seatpost
- KS Lev Ci 175mm dropper seat post review
- Merida Expert Dropper 27.2mm
What's the longest travel post that I can use?
While the general aim of the game is to get the longest travel dropper post you can for your budget as it'll allow you your proper pedalling height as well as maximum clearance. With some offering up to a whopping 200mm of drop, there's lots of travel on offer. However, in reality, you're likely to be limited by a number of factors.
First up, you need to calculate the biggest amount of drop your frame and maximum saddle height will allow. Start by measuring from the top of your frame tube to the top of your saddle rail when it's at your perfect pedalling height, noting the number down.
You then need to find an example of the dropper post you're interested in, compress it fully and measure it from the top of where the saddle rail would go to the point that's the lowest the post could fit in a frame - usually a collar at the top of it.

Subtract one from the other and the figure you're left with is the theoretical maximum travel dropper post travel you could have with that design. Anything under it will fit just fine, but you'll obviously be restricted to the travel options the manufacturer offers.
It's worth noting that not all droppers are equal here - some will be longer overall for a given travel, meaning they might be too tall compared to a different model of the same travel that does fit. There's no real way to tell apart from measuring, either.
Will it fit into my frame?

All that clear as mud for you? Good, because a longer travel dropper post also needs a longer body to drop into, which in turn means it needs a greater insertion depth into the frame. If you have a frame with a short seat tube or one that's offset or kinked, you might not be able to get the post far enough into the frame in the first place, so you'll need to figure out the maximum insertion depth of your frame.
To do that, get a conventional, fixed post and stick it as far into your frame as it'll go, where it might bottom out. if it does, mark by the collar then pull it back out and measure from there to the end of the post and you'll know the figure - otherwise, it's the same as the length of that post.
If the sum of the overall length of the extended dropper post minus the optimum pedalling height you measured earlier is lower than the maximum insertion depth of your frame, you should be fine. It's worth noting some internal dropper posts do have fixed gubbins such as actuators that extend below the stated overall post length, which can throw a last-minute spanner into the works. Many posts aren't keen on having the cable crushed or bent at this point either, so err on the side of caution and make sure there's decent clearance.
If the number crunching seems a bit intense, then it's worthwhile it'll save you buying a long travel post and realising it doesn't fit, as it's not possible to change the travel on mkost of them. That's why eBay and the classified ads are often flooded with people trying to sell or swap unused dropper posts that they couldn't get in their bikes after buying them - bargains ahoy!
Should I go for internal or external remote routing?

You'll also need to know whether your frame has internal dropper post remote cable routing. This is easy enough to find out as there will likely be a small hole towards the base of the seat tube to allow an internally routed cable to exit there, though sometimes the routing is all internal up to the headtube. Most modern frames and bikes will have this feature and although fitting is often a faff, it's a much cleaner setup that's less prone to issues once successfully installed.
If you don't have internal routing, you'll be limited to using a post with an externally routed remote or one that has an actuation lever on the post itself. The downside to these designs is that they tend to have more cable flapping about on the bike which doesn't look as neat and makes the whole setup more prone to dirt ingress and damage.
Be aware that if you want to switch the post from one bike to another, an internally routed post will make that a nightmare job.
We'd say that you always opt for internal routing if you have the option - though there are now wireless dropper options from SRAM and Magura that make this a moot question, at a (very high) price premium.
What sort of remotes are there?

Your choices here are bar mounted or one fixed to the post. The latter are generally only found on budget items and we wouldn't recommend them as you need to take your hands off the bar to operate them.
When it comes to bar mounted remotes, you'll need to pick one that works with your current controls. most people prefer to run the remote under the bar on the left-hand side, which makes it easy to operate without loosening your grip on the bar. This is made easy if you're running a single chainring drivetrain system and most designs are now made to mirror how a left-hand shifter would work.
If that space is currently taken by a left-hand gear shifter, you'll need to check that you chosen shifter will fit in the space and work properly. Many designs are meant to work both above and below the bar, but some aren't. See if you can have a go on one to see what works for you.
It's worth noting that if you have remote lockouts on your bar for your front or rear suspension, you'll need to set it all up so it works together. Think which controls you'll be using the most and prioritise bar space accordingly.
Cable or hydraulic, which remote is best?

Most remotes use a cable to operate then, with the notable exception of the RockShox Reverb range of posts, which are hydraulic. The jury is out on which is best; hydraulic lines don't suffer from friction increases due to dirt ingress or tighter bends in the cable and tend to be more consistent in feel over time, while cables are cheaper and easier to service and don't require any special tools to replace or repair - if anything goes wrong with a hydraulic line you'll need to bleed it with special fluid as a minimum.

You can now also consider wireless dropper posts. They're still extremely expensive but do have the benefit that they're easy to switch from one bike to another (assuming everything fits) and you'll now only need to worry about charging batteries rather than sticky cables or routing through a frame. Magura and RockShox both have options, but both designs are in their infancy so it's hard to comment on function or reliability.
What are the downsides of having a dropper post?
The main drawback is expense. With budget items starting at around £100 and the latest wireless designs being over £700, they're significantly more expensive than normal posts, where a low-end item will cost about £20.
There's no getting around that they're also much heavier too, with even top-end carbon items usually weighing more than a basic aluminium fixed post.
Complexity is also an issue. While the days of unreliable and crudely functioning posts are behind us for the most part, they can still go wrong, with lack of maintenance being an issue, sticky cables being a prime example. Many aren't a fan of cold weather conditions either, as it can play havoc with the rubber sealing rings that keep everything running and you can end up with a post that's stuck up, down or somewhere in-between.
Overall, we do love them and think they're well worth the trouble. If you have any more questions, comments or think we've missed something out, do let us know in the comments.